NVivo is a qualitative data analysis software package that allows you to organize, query, analyze, and visualize a wide variety of qualitative and mixed methods data. This guide will introduce you to the most important functions of NVivo to get you started on your project.
Please note: MERIT hosts this information (created by a former staff member). MERIT no longer has the staff expertise to support questions related to qualitative research tools. We encourage you to reach out to the Social Science Computing Cooperative (SSCC) for additional assistance. SSCC provides tools and advice to researchers who use statistical analysis in their work. SoE currently funds SSCC accounts at no cost to SoE departments.
This is an accordion element with a series of buttons that open and close related content panels.
Creating a New Project
Open NVivo and select New Project from the welcome screen. Enter a project name, select where you’d like your project to be stored on your computer, and add any descriptive info you’d like to include.

On the next screen, choose the autosaving and recovery options you prefer for your project and click Create.
Please note: Even if you utilize NVivo’s automatic recovery options, it’s important to make regular manual backups of your project and all of your project data and store it in a separate location (ie. an external hard drive, flash drive, cloud storage, etc.).
Importing your Data
Once you’ve created your project, the next step is to import your data sources to the project. You can do this via the Import tab.

Most source data will fall under the category of “Files”. These source and file types include:
- Documents, including Word documents and PDFs (.txt, .pdf, .docx, .rtf)
- Datasets (.xlsx, .csv, .txt)
- Audio and video files (.mp3, .m4a, .mpg, .wma, .wav, .mp4, .mov, .qt)
- Images (.bmp, .gif, .jpg, .png, .tiff)
For a complete list of supported file categories and types, please see NVivo – About Sources
If you have sources that you cannot import into NVivo — for example, physical sources like books or movies, digital sources from unsupported file types like PowerPoint presentations, or very large audio or video files, you can create an External reference for these sources. This will allow you to add notes, outlines, or summaries of the source, code and analyze this content, and link directly to digital sources. For more information on Externals, please see NVivo – Creating External Sources
If you’d like to import data directly from the web, such as Facebook, Twitter, and YouTube content, you can use the NCapture browser plugin to collect this data to a .nvcx file that can then be directly imported to your project.
If you have collected survey data in Excel, Qualtrics, or SurveyMonkey, you can use the Survey Import Wizard to format and import that data.
Organizing your Data
Once you have imported your data into NVivo, you will want to set up an organizational system to manage it.

Under the Data section on the left, you can create a hierarchical data structure of folders, nested to as many levels as you like. You can organize your files by data type, case, dates, geographical locations, etc. Files can be dragged and dropped between containers. Once you have organized your data, you can select a container and NVivo will display all of the files in the main content area.
Coding your Data
NVivo allows for both inductive and deductive coding schemes depending on the methods you are using for your research.
If you will be using a more deductive method of coding, you can prepare your codebook by right clicking Codes on the left and selecting New Code, or via the Create tab by selecting Code. You’ll need to name your code and can add descriptive information, a nickname, and a color assigned to the code.
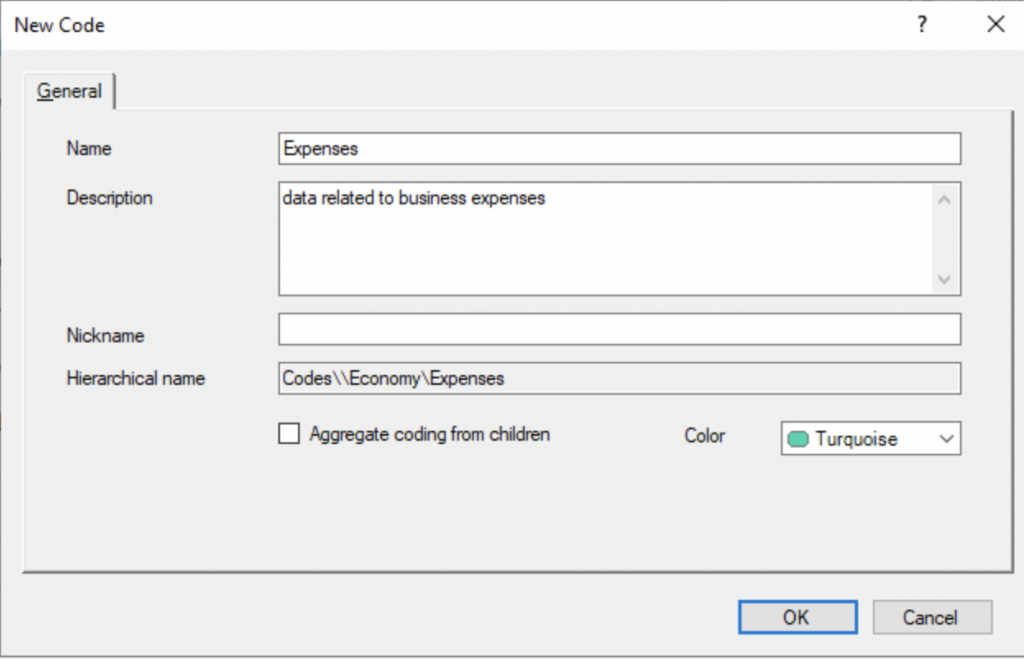
NVivo allows for unlimited hierarchical coding (“children” codes). If the code you are creating is a sub-code/child of a parent code, enter the location where you’d like it to live in the hierarchy under Hierarchical name.
To code your data, select an item from your files, highlight the words/passages you’d like to code, right click and choose Code selection

You can then choose the code you’d like to use for the selection and apply it. If you are using a more inductive approach to coding, you can also create new codes from this dialogue box.
Alternatively, you can use the Code to drop down menu at the bottom of your screen to quickly select a code and apply it to a snippet.

To view your coding structure and items that have been coded to a particular code, select Codes on the left. Double click any code to display all items that are coded for that particular code.

Memos and Annotations
Memoing and annotating is a critical part of the qualitative research process, allowing you to record insights and understandings, build theory, and note questions or issues that arise during the analysis process to build your qualitative story. Comprehensive memos and annotations on the decisions you make while coding and doing analysis will provide a roadmap for your research process.
Memos are longer pieces of writing to discuss your theories and decisions. Memos can be tied to specific pieces of data or used as a more general reflection or note taking tool about your dataset as a whole. The information in a memo can be coded like any other piece of data in your project.
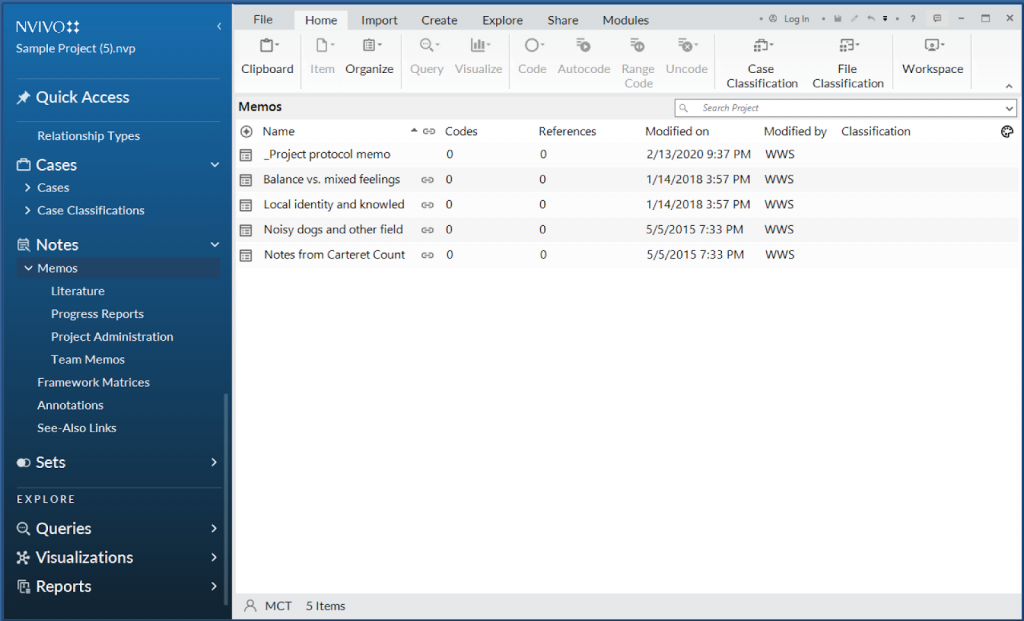
Memos can be accessed via the Notes section on the left or via the Create tab.
Annotations are essentially comments — think the scribbles you make in the margins, reminders, brief questions, clarifications or code justifications. To add an annotation, simply highlight the info you want to annotate, right click and choose New Annotation. Annotated text will be highlighted in blue and the annotations will display below. Annotations cannot be coded or queried.
Querying your Data
NVivo provides a wide range of query tools to explore your data and find patterns and themes for analysis. Some types of queries available are:
- Text search — find occurrences of words, phrases, or concepts.
- Word frequency — find the most frequently occurring words or phrases.
- Coding — find all information coded with a selected code or codes.
- Matrix — find co-occurrences or intersections of themes.
For a full list of queries and how they can be used, please see NVivo – Queries
Queries are created in the Explore tab. The Query Wizard can help you select and build an appropriate query or you can use the tools for each query type.
You can save both queries and the results, allowing you to easily run the same queries several times as you continue to refine your coding.
